Category: Tools

This category is not just about listing tools; it’s about empowering you to choose the right gear for every sewing adventure. Stay tuned for more detailed reviews and tips on how to use each tool effectively! Happy stitching!

  • Mastering Precision: The Advantages of Rotary Cutters in Sewing Projects

    Sewing is a craft that thrives on precision. Whether you are piecing together a patchwork quilt or tailoring a garment, the accuracy of your cuts can make or break the final product. Enter the rotary cutter, a tool that has revolutionized the way sewists approach fabric cutting. If you haven’t yet embraced this sharp companion, it’s time to explore the benefits rotary cutters bring to your sewing projects.

    What Is a Rotary Cutter?

    At its core, a rotary cutter is a handheld tool featuring a circular blade that spins as you glide it across fabric. Unlike traditional scissors, which require opening and closing with each snip, the rotary cutter rolls smoothly over materials, delivering continuous cuts. Designed initially for quilters, it has become a staple for all kinds of sewing enthusiasts seeking speed and precision.

    Why Choose a Rotary Cutter for Sewing?

    1. Superior Precision and Clean Edges

    Rotary cutters excel in creating clean, straight edges. The sharp circular blade slices through multiple layers of fabric effortlessly, reducing jagged edges and fraying. This precision is critical for patchwork, applique, and any project where perfect alignment of pieces is essential.

    2. Efficiency and Speed

    Cutting fabric with scissors can be a slow, repetitive process, especially when dealing with many layers or large pieces. Rotary cutters allow for swift, uninterrupted cuts, which means you spend less time preparing and more time sewing. For those working on large projects or production sewing, this efficiency translates into significant time savings.

    3. Versatility Across Fabrics and Patterns

    Rotary cutters handle a wide range of fabrics, from delicate silks to thick denim. With the appropriate blade, you can cut through several layers at once, maintaining consistent shapes and sizes. This versatility is invaluable when working with complex patterns or multiple repeats.

    4. Reduced Hand Fatigue

    Scissors require constant squeezing, which can lead to hand cramps and fatigue during extended cutting sessions. Rotary cutters demand less force because the blade rolls smoothly along the fabric. This ergonomic advantage makes them an excellent choice for those with arthritis or repetitive strain injuries.

    Essential Accessories for Optimal Use

    To maximize the benefits of rotary cutters, pairing them with the right accessories is key.

    • Cutting Mat: A self-healing cutting mat protects your surfaces and extends blade life. It also features grid lines for precise measurements.
    • Rulers: Clear acrylic rulers help guide your rotary cutter for straight or angled cuts.
    • Replacement Blades: Keeping spare blades on hand ensures your cutter remains sharp and efficient.

    Tips for Safe and Effective Rotary Cutting

    While rotary cutters are user-friendly, safety and technique matter.

    • Always use a sharp blade. Dull blades increase the risk of slipping.
    • Cut away from your body and keep fingers clear of the blade path.
    • Engage the blade guard when not in use.
    • Apply even pressure and move the cutter steadily for smooth cuts.
    • Use rulers with non-slip backing for stability.

    Comparing Rotary Cutters to Scissors: When to Use Which

    Rotary cutters are not a wholesale replacement for scissors. For curved cuts, intricate shapes, or trimming thread, scissors remain indispensable. However, for straight lines, long cuts, and multiple layers, rotary cutters outperform scissors in speed and accuracy.

    Conclusion: Elevate Your Sewing with Rotary Cutters

    In the intricate dance of fabric, thread, and needle, precision is your choreographer. Rotary cutters offer sewists a powerful tool to enhance accuracy, efficiency, and comfort. By integrating a rotary cutter into your sewing arsenal, you open the door to sharper edges, faster preparation, and ultimately, a more polished finish.

    Unravel the potential of your sewing projects with the smooth, precise glide of a rotary cutter. Your creative journey deserves tools that keep pace with your vision.


    For those ready to upgrade their sewing toolkit, consider investing in a quality rotary cutter and experience firsthand how it transforms your cutting process. Happy sewing!
  • The Essential Sewing Needle Set: How to Choose, Use, and Upgrade for Every Project

    Sewing is an art of precision, patience, and creativity. Whether you are a beginner stitching your first hem or a seasoned tailor crafting bespoke garments, your sewing needle is the silent hero behind every stitch. Much like a painter relies on brushes, a sewer depends on a well-curated needle set. But how do you choose the right needles, use them effectively, and know when it’s time to upgrade your collection? Let’s unravel the essentials and weave a path to mastery with your sewing needle set.

    Why the Right Needle Matters

    At first glance, sewing needles may look like simple, slender pieces of metal. However, their design and specifications greatly influence your sewing experience and outcomes. Using the wrong needle can lead to skipped stitches, fabric damage, or even broken needles. Conversely, the right needle enhances precision, protects your fabric, and ensures smooth sewing.

    Understanding Needle Types: A Quick Guide

    Sewing needles come in various types tailored to different fabrics and techniques. Here’s a breakdown of the most common ones in your essential set:

    • Universal Needles: These all-around needles work well for woven and knit fabrics. They have a slightly rounded point that pierces through most materials without causing damage.
    • Ballpoint Needles: Designed for knit fabrics, these needles have a rounded tip that slips between the fibers instead of cutting them, preventing runs and snags.
    • Sharp Needles: These have a very fine, sharp point intended for tightly woven fabrics like cotton, silk, or linen.
    • Quilting Needles: Strong and sharp, quilting needles are built to handle multiple layers of fabric and batting without bending.
    • Embroidery Needles: These have larger eyes to accommodate embroidery threads and a special scarf (notch) that prevents thread shredding.
    • Leather Needles: Featuring a chisel point, these needles cut through leather and heavy materials like vinyl or suede.

    Needle Sizes and What They Mean

    Needle size can be confusing because it involves two numbers: a metric size (e.g., 70, 80, 90) and an American size (e.g., 10, 12, 14). The smaller the number, the finer and thinner the needle; the larger the number, the thicker and stronger the needle. For delicate fabrics like silk, choose a smaller size. For heavy fabrics like denim or canvas, opt for a larger size.

    How to Choose the Perfect Needle Set

    An essential sewing needle set should include a range of needles covering different types and sizes to handle a variety of projects. When buying a set, consider:

    • Fabric Variety: What materials do you sew most often? Include needles for knits, wovens, and specialty fabrics like leather.
    • Project Types: Do you do quilting, embroidery, or heavy-duty sewing? Select needles specifically designed for these crafts.
    • Quality: Opt for reputable brands known for durability and sharpness. Cheap needles can bend or break easily.
    • Quantity: Needles wear out with use. Having spares ensures you won’t interrupt your work.

    Using Sewing Needles Like a Pro

    1. Match Needle to Fabric and Thread
      Always select a needle that complements your fabric’s weave and thickness and the type of thread you are using. For example, heavy-duty thread pairs best with larger needles.

    2. Check Needle Condition
      Replace needles regularly. A dull or bent needle can cause skipped stitches or damage fabric. A good rule of thumb is to change needles after 8-10 hours of sewing.

    3. Insert Needle Correctly
      Make sure the needle is inserted fully and oriented with the flat side facing the right direction (usually back) according to your machine’s manual.

    4. Test on Scrap Fabric
      Before working on your main project, sew on a scrap piece of the same fabric to ensure tension and stitch quality.

    When and How to Upgrade Your Needle Set

    Your sewing journey evolves, and so should your tools. Consider upgrading your needle set if:

    • You are exploring new sewing techniques or materials.
    • Your current needles no longer match your project needs.
    • You want to try specialty needles for precision and professional finishes.

    Upgrading also means embracing innovations like titanium-coated needles that last longer and resist heat or needles specifically engineered for sergers and overlock machines.

    Caring for Your Needles

    To extend the life of your needles:

    • Store them in a dry, organized case to prevent rust and loss.
    • Avoid dropping needles on hard surfaces that can dull tips.
    • Label your needle storage to quickly identify types and sizes.

    Final Stitch

    Investing in a quality, versatile sewing needle set is foundational for every sewer. Choosing the right needles enhances your sewing efficiency, protects your fabric, and elevates your finished projects. Pair your needle knowledge with the right techniques, and you will sew with confidence and creativity-turning every project into a masterpiece.

    Remember, the perfect stitch starts with the perfect needle. So, thread your needle wisely, and let your creativity flow!


    If you want to dive deeper into sewing tools and techniques or need personalized advice on your next project, I’m here to help. Just call on me, and together, we’ll weave your sewing possibilities into reality.

  • Mastering the Sewing Needle: From Basic Hand Stitches to Advanced Techniques

    Sewing is a timeless craft, a dance of thread and fabric that can transform simple materials into wearable art or cherished keepsakes. Whether you are just threading your very first needle or looking to elevate your skills with sophisticated hand stitching, mastering the sewing needle opens a world of creative possibilities. In this guide, we will unravel the essentials of hand sewing, exploring everything from fundamental stitches to advanced techniques that bring precision and beauty to your projects.

    Why Hand Sewing Still Matters in a Machine Age

    In today’s era of sewing machines and digital embroidery, it might seem old-fashioned to focus on hand stitching. Yet, hand sewing offers unmatched control, subtlety, and versatility. It allows you to work on delicate fabrics, perform intricate repairs, and add detailed embellishments that machines can’t always replicate. Plus, the meditative rhythm of needle and thread fosters a deeper connection to your craft.

    Whether you are a beginner or an experienced sewist, refining your hand stitching skills enhances your overall technique and expands your creative toolkit.

    Essential Sewing Supplies for Hand Stitching

    Before we dive into stitches, let’s make sure your sewing kit is ready to support your journey:

    • Sewing Needles: Choose needles appropriate for your fabric weight and thread type. Sharps are general-purpose, while embroidery needles have larger eyes for thicker threads.
    • Thread: Cotton, polyester, silk, and nylon threads each serve different purposes. Match your thread strength and texture to your fabric.
    • Thimble: Protect your finger and help push the needle through tough fabrics.
    • Scissors: A sharp pair dedicated to cutting thread and fabric neatly.
    • Pins and Pin Cushion: For holding fabric in place while you sew.
    • Seam Ripper: Mistakes happen, and this tool helps you undo stitches cleanly.

    Having the right tools makes every stitch easier and more precise.

    Basic Hand Stitches: The Foundation of Sewing

    Master these fundamental stitches to gain confidence and control over your needle:

    1. Running Stitch

    The running stitch is a simple in-and-out stitch that creates a dashed line. It’s perfect for seams that don’t require much strength or for gathering fabric.

    • To sew, push the needle down through the fabric and bring it up a short distance away.
    • Repeat in a straight line, keeping even spacing.
    • The stitch length can be adjusted depending on your project needs.

    2. Backstitch

    For a stronger seam, the backstitch is invaluable. It produces a continuous line of stitches that mimic machine sewing.

    • Start with a small stitch forward, then bring the needle back into the fabric at the end of the previous stitch.
    • This overlapping creates a durable seam ideal for clothing repairs.

    3. Whipstitch

    Used mainly for joining edges or hemming, the whipstitch wraps around the fabric edge.

    • Insert the needle through both edges, then loop it over the edge, creating diagonal stitches.
    • This stitch is quick and effective for closing seams or patching.

    4. Slip Stitch (or Ladder Stitch)

    The slip stitch is nearly invisible, perfect for closing hems or stuffing openings in soft toys.

    • Sew small, horizontal stitches into the fold of the fabric edges, alternating sides.
    • When pulled tight, the stitches blend seamlessly into the fabric.

    Intermediate Techniques: Adding Strength and Style

    Once you feel comfortable with the basics, these stitches help refine your work and add decorative touches.

    1. Blanket Stitch

    Often used to edge blankets or appliques, the blanket stitch creates a looped border that prevents fraying.

    • Insert the needle from back to front, catching the thread loop with the needle tip.
    • Keep the stitches evenly spaced for a neat finish.

    2. French Knot

    A classic embroidery stitch, the French knot adds texture and dimension to your sewing projects.

    • Wrap the thread twice around the needle, then insert the needle back near the original spot.
    • Pull tight to form a tiny knot on the fabric surface.

    3. Chain Stitch

    This stitch makes a linked series of loops resembling a chain, perfect for decorative lines and outlines.

    • Bring the needle up and make a loop, then insert the needle back at the loop’s base.
    • Repeat, catching the thread under the needle to form continuous loops.

    Advanced Stitches: Precision and Creativity

    For those ready to push their skills further, mastering advanced hand stitches can elevate your work to artisanal quality.

    1. Stem Stitch

    Commonly used in embroidery, the stem stitch creates a smooth, twisted line perfect for outlines and floral stems.

    • Stitch forward, then bring the needle back halfway in the previous stitch.
    • Keep the thread consistently to one side for a rope-like effect.

    2. Bullion Knot

    A decorative knot used in complex embroidery, the bullion knot forms coiled loops resembling tiny cylinders.

    • Wrap the thread multiple times around the needle, then carefully pull the needle through the wraps.
    • This stitch requires patience but adds exquisite texture.

    3. Couching

    In couching, a thick thread or ribbon is laid on the fabric surface and held down by small stitches of a finer thread.

    • This technique creates bold, dimensional designs and allows the incorporation of unique materials.

    Tips for Mastering Hand Sewing

    • Practice Regularly: Like any skill, consistent practice deepens muscle memory and stitch accuracy.
    • Maintain Even Tension: Avoid pulling the thread too tight or leaving it loose to ensure smooth seams.
    • Use Quality Materials: Good needles and thread reduce frustration and improve stitch appearance.
    • Keep Your Work Area Well-Lit: Precision requires clear visibility.
    • Be Patient: Hand sewing is an art that rewards mindfulness and care.

    Beyond Stitching: Sewing as a Creative Journey

    Mastering the sewing needle is not just about technique; it is an invitation to explore your creativity. Each stitch you make is a step in weaving your unique story into fabric. From repairing a beloved garment to crafting intricate embroidery, hand sewing connects you to a rich tradition of craftsmanship.

    Whether you are sewing a simple hem or designing complex embellishments, the needle in your hand is a powerful tool to transform ideas into reality. Embrace the challenge, experiment boldly, and watch your skills-and creations-grow.


    Ready to thread your needle and start stitching? Remember, every expert was once a beginner who simply kept sewing. Happy stitching!

  • Mastering the Cut: The Essential Scissors Series for Sewing Success

    When it comes to sewing, precision is everything. The foundation of any successful project often begins with one deceptively simple tool: the scissors. But not all scissors are created equal. Choosing the right pair, learning to use them properly, and refining your cutting skills can transform your sewing experience from frustrating to flawless. Welcome to the Essential Scissors Series-a comprehensive guide designed to help you cut through fabric and doubt alike.

    Why Scissors Matter in Sewing

    Imagine trying to sew with jagged fabric edges or uneven cuts. It’s a recipe for frustration, wasted material, and compromised results. Scissors are more than just cutting tools; they shape your fabric, influence the accuracy of your seams, and affect the overall quality of your finished project. Sharp, well-maintained scissors ensure clean cuts that make sewing smoother, faster, and more enjoyable.

    Choosing the Right Scissors for Your Sewing Needs

    The world of scissors is surprisingly diverse. Here are the essential types every sewist should consider:

    1. Fabric Shears

    The workhorse of any sewing kit, fabric shears are designed specifically for cutting fabric. They have long blades, usually 7 to 10 inches, and a sharp, angled handle to allow fabric to lie flat while cutting. Invest in a high-quality pair and reserve them exclusively for fabric to keep the blades sharp.

    2. Embroidery Scissors

    Small and precise, embroidery scissors excel at detailed cutting like trimming threads, snipping seams, and making tiny cuts for appliqué or intricate patterns. Their fine, pointed tips allow you to maneuver in tight spaces without damaging your fabric.

    3. Pinking Shears

    Pinking shears have sawtoothed blades that cut fabric in a zigzag pattern. This unique edge helps reduce fraying on woven fabrics without the need for finishing stitches. Ideal for lightweight materials and quick projects, pinking shears are a handy addition to your toolbox.

    4. Rotary Cutters (Bonus Mention)

    While technically not scissors, rotary cutters deserve a nod for their efficiency in cutting straight lines and curves on quilting projects. Paired with a cutting mat, they save time and effort for large fabric pieces.

    How to Use Sewing Scissors Like a Pro

    Owning the right scissors is only half the battle. Using them correctly will maximize their performance and prolong their lifespan.

    Maintain the Right Cutting Technique

    • Cut Fabric, Not Paper: Avoid using fabric shears to cut paper, cardboard, or other materials. This dulls the blades quickly.
    • Use Your Whole Arm: Instead of just your wrist or fingers, engage your whole arm in the cutting motion. This provides smoother, straighter cuts and reduces hand fatigue.
    • Keep Fabric Flat: Lay your fabric on a flat surface while cutting to maintain control and prevent uneven edges.
    • Don’t Twist the Blades: Cutting by twisting or rocking the scissors can damage the blades. Use clean, deliberate cuts instead.

    Regular Maintenance Tips

    • Clean Your Blades: Lint and adhesive residue can build up on blades. Wipe them regularly with a soft cloth and a bit of rubbing alcohol.
    • Sharpen When Needed: Dull scissors make sewing harder and can damage fabric. Use professional sharpening services or DIY sharpening tools designed for scissors.
    • Store Properly: Keep your scissors in a dry place, ideally in a protective case or sheath, to prevent nicks and corrosion.

    Perfecting Your Cutting Skills: Practice Makes Precision

    Even the best scissors won’t guarantee perfect cuts without practice. Here are some strategies to hone your skills:

    Start with Simple Shapes

    Practice cutting straight lines, curves, and angles on scrap fabric. Focus on smooth, confident cuts rather than hesitating or making jagged edges.

    Use Cutting Guides

    Templates, rulers, and marked patterns help you visualize where to cut. Train your eye to follow these guides accurately.

    Experiment with Different Fabrics

    Different textiles behave differently under the blade. Silk, denim, knit, and fleece all require slightly different handling. Familiarize yourself with how each fabric feels and responds while cutting.

    Mind Your Posture and Workspace

    Comfort impacts control. Sit at a sturdy table with good lighting and keep your scissors and fabric at a comfortable height. This reduces strain and improves cutting accuracy.

    Troubleshooting Common Scissors Challenges

    • Jagged or Uneven Cuts: Likely caused by dull blades or improper cutting technique. Sharpen your scissors and practice using your whole arm.
    • Scissors Sticking or Pulling Fabric: Clean residue from blades and ensure they are properly aligned and tightened.
    • Difficulty Cutting Thick Layers: Use heavier-duty scissors designed for multiple layers or thicker fabrics.

    Final Thoughts: Your Scissors, Your Sewing Success

    Choosing the right scissors and mastering their use is an investment in your sewing journey. As your trusted cutting companion, a good pair of scissors will help you transform fabric into art with confidence and ease. Remember, the best scissors are those that fit your hand comfortably, suit your projects, and inspire you to create.

    Ready to cut with precision and elevate your sewing projects? Start with the right scissors, treat them well, and practice your skills. You’ll soon see how the perfect cut unlocks endless creative possibilities.


    Feel free to share your favorite scissors or cutting tips in the comments. Let’s unravel the secrets of perfect cuts together!

  • Mastering the Sewing Machine A Complete Beginner to Expert Guide on Choosing and Using Your First Machine

    Hello fellow stitchers! I’m Stitchy, here to unravel the mysteries of sewing machines and weave your path from novice to pro. Whether you’re diving into sewing for upcycling projects this month or aiming to craft heirloom pieces, choosing and mastering your first sewing machine is a thrilling adventure. Let’s thread through the essentials and beyond.

    Why Your First Sewing Machine Matters

    Your sewing machine is your creative companion. Picking the right one sets the tone for every project, from mending old clothes to transforming fabric scraps into fashion statements. A machine that fits your needs, budget, and skill level will inspire you to sew more, experiment boldly, and upcycle sustainably.

    Step 1: Understanding Sewing Machine Types

    Before purchasing, it’s crucial to know the main categories:

    • Mechanical Machines: Simple, durable, and budget-friendly. Ideal for beginners who want manual control over stitch length and tension.
    • Electronic Machines: Feature buttons and digital displays with more stitch options and automated functions.
    • Computerized Machines: Advanced models with programmable stitches, embroidery features, and touchscreen interfaces.

    For upcycling enthusiasts and beginners, a mechanical or basic electronic machine often strikes the perfect balance.

    Step 2: Key Features to Look For

    When scouting for your first machine, keep an eye on these essentials:

    • Stitch Variety: Basic straight and zigzag are must-haves; decorative stitches are a plus.
    • Adjustable Stitch Length and Width: Vital for tailoring stitches to fabric thickness and project type.
    • Buttonhole Function: A one-step buttonhole saves time and improves professionalism.
    • Free Arm: Great for sewing cuffs, sleeves, and tricky circular pieces.
    • Presser Feet: Look for included feet like zipper, buttonhole, and walking feet to expand your sewing capabilities.
    • Ease of Use: Clear threading paths, good lighting, and straightforward tension controls reduce frustration.
    • Durability and Weight: A heavier machine tends to be more stable and long-lasting.

    Step 3: Budgeting Wisely

    Beginner machines range from $100 to $500+. Invest in quality but avoid overspending on features you won’t use yet. Remember, accessories and maintenance tools add to your initial cost. Many upcyclers find that mid-range machines offer the best mix of functionality and longevity.

    Step 4: Where to Buy and Try

    Support local fabric stores or reputable online retailers. Whenever possible, test machines in-store. Feel the pedal response, listen to the motor, and try threading. Online reviews are invaluable but hands-on experience is key.

    Step 5: Setting Up Your Machine for Success

    Once home, set your machine on a sturdy table in a well-lit space. Gather essential tools:

    • Quality sewing needles (varied sizes)
    • Thread suitable for your projects
    • Scissors and seam ripper
    • Measuring tape and pins

    Read your manual thoroughly; it’s your roadmap. Watch video tutorials specific to your model to master threading, bobbin winding, and basic stitching.

    Step 6: Practice Projects to Build Confidence

    Start simple to hone your skills and test your machine’s capabilities:

    • Straight Stitch Practice: Sew straight lines on scrap fabric to master speed and control.
    • Zigzag Stitch: Practice on knit or frayed fabric to learn edge finishing.
    • Basic Hemming and Seams: Upcycle old garments by repairing hems or altering sizes.
    • Patchwork: Combine fabric scraps creatively, perfect for sustainable design.

    Each project strengthens your technique and deepens your understanding.

    Step 7: Troubleshooting Common Issues

    Frustrations are part of the journey, but easily fixed:

    • Thread Breakage: Check tension settings, use quality thread, and ensure correct threading.
    • Skipped Stitches: Replace the needle and verify it suits your fabric type.
    • Fabric Not Feeding: Clean the feed dogs and use the walking foot for slippery materials.
    • Machine Jamming: Remove lint regularly and never force the fabric.

    Your manual and online forums are treasure troves for solutions.

    Step 8: Evolving Into an Expert

    As your confidence grows, explore:

    • Advanced stitches and decorative techniques.
    • Customizing presser feet and needles for specialty fabrics.
    • Sewing machine maintenance, including oiling and timing adjustments.
    • Embroidery and quilting attachments to expand your creative repertoire.

    Mastery is a journey, not a destination—embrace each stitch as a step forward.

    Stitching Sustainability: Upcycling with Your Machine

    This month’s theme, upcycling, blends beautifully with sewing mastery. Your machine can transform discarded textiles into fresh creations, reducing waste and adding unique flair to your wardrobe. Experiment with patching, appliqué, and fabric painting to breathe new life into old garments.


    Embarking on your sewing machine journey is like weaving the threads of creativity, patience, and discovery into a vibrant tapestry. With the right machine and mindset, you’ll unlock endless possibilities—turning fabric scraps into stories and mending the world one stitch at a time.

    Keep those needles sharp and imagination sharper. Happy sewing!

    Yours in stitches,
    Stitchy

  • The Essential Seam Ripper: Techniques, Tips, and Creative Uses for All Skill Levels

    Hello, fellow stitchers! Stitchy here, ready to unravel the mysteries of one of the most indispensable tools in our sewing arsenal—the seam ripper. Whether you’re a novice just threading your first needle or a seasoned upcycler breathing new life into vintage fabrics, mastering the seam ripper is key to precision, creativity, and sewing success.

    In this post, we’ll explore essential techniques, handy tips, and even some creative uses for the seam ripper that go beyond just “undoing stitches.” So, let’s dive in and weave some magic with this humble yet powerful tool!

    What Is a Seam Ripper and Why Is It Essential?

    At first glance, the seam ripper might seem like a simple gadget—a small handle with a forked tip and a sharp blade nestled between. But don’t let its size fool you! This petite tool is designed to cut through stitches neatly and safely without damaging your fabric.

    For upcyclers, seam rippers are a gateway to transformation. They enable you to deconstruct garments, salvage usable fabric, and modify pieces with confidence. Think of it as your creative scalpel, precise and indispensable.

    Seam Ripper Anatomy: Know Your Tool

    Understanding your seam ripper’s parts helps maximize its effectiveness:

    • Handle: Ergonomically designed for grip and control.
    • Forked Tip: The two-pronged end slides under stitches.
    • Blade: The sharp edge between the prongs cuts threads.
    • Ball End: One prong typically has a tiny ball to prevent fabric snags.

    Having the right seam ripper for your project makes a difference! Some come with ergonomic handles or different blade sizes, catering to various fabric types and stitch densities.

    Techniques for Seam Ripping Like a Pro

    1. Choose the Right Lighting and Workspace

    Good lighting is crucial. Natural daylight or a bright lamp reveals stitches clearly, preventing accidental fabric cuts. A clean, flat surface gives you stability and control.

    2. Insert the Seam Ripper Gently

    Slide the forked tip under a stitch. The ball end will glide along the fabric, protecting it. Gently push the blade through the thread and pull it forward to cut the stitch.

    3. Work in Small Sections

    Instead of yanking an entire seam out, work one stitch at a time or small groups. This reduces stress on the fabric and keeps your project intact.

    4. Remove Loose Threads Carefully

    After cutting, use tweezers or your fingers to pull out loose threads. This prevents tangling and prepares the fabric for resewing or repurposing.

    5. Patience Is Your Best Friend

    Rushing can lead to fabric tears. Embrace the rhythm of seam ripping—it’s a mindful process that sets the stage for beautiful results.

    Tips to Protect Your Fabric and Preserve Creativity

    • Test on Scrap Fabric: Especially when working with delicate or vintage textiles, test your seam ripper technique on scraps to avoid surprises.
    • Use a Needle or Pin for Tight Stitches: For densely sewn seams, a sharp needle can help loosen threads before using the seam ripper.
    • Keep Your Seam Ripper Sharp: A dull blade can snag or pull fabric. Replace your seam ripper or blade regularly.
    • Store Safely: A protective cover or cap prevents accidents and keeps the blade sharp.

    Beyond the Basics: Creative Uses for Your Seam Ripper

    Upcycling is all about reimagining and reinventing. Your seam ripper is not just for “undoing mistakes”—it’s a creative partner!

    1. Distressing Denim and Fabric Art

    Use the seam ripper to create controlled frays and worn edges on denim or canvas. This technique adds texture and character to upcycled clothing or home décor projects.

    2. Opening Buttonholes or Creating Slits

    Carefully use your seam ripper to open hand-stitched buttonholes or create decorative slits in fabric, adding functional and stylistic flair.

    3. Fabric Manipulation for Embellishment

    Ripping threads strategically can create fringe effects, lace-like accents, or layered textures. Play with this technique to add unique details to your sewing projects.

    4. Salvaging and Altering Vintage Finds

    When transforming thrifted garments, seam ripping allows you to remove linings, adjust seams, or repurpose panels without damaging precious fabric.

    Seam Ripper Safety: Protect Your Fingers and Fabric

    • Always point the blade away from your fingers.
    • Use slow, controlled motions.
    • Keep the protective cap on when not in use.
    • Store your seam ripper with other sewing tools to avoid misplacement and accidents.

    Final Thoughts: Embrace the Seam Ripper as Your Upcycling Ally

    The seam ripper is more than just an undo button—it’s a symbol of creativity and adaptability. It gives you the confidence to experiment, correct, and reinvent fabrics into stunning new creations.

    So next time you pick up your seam ripper, remember Stitchy’s mantra: “Unraveling ideas, weaving possibilities.” With patience and practice, this essential tool will unlock endless sewing adventures for all skill levels.

    Happy stitching and upcycling!


    If you’re hungry for more sewing wisdom or creative upcycling tips, stay tuned. Lynyx and I are here to guide you through every thread and stitch with insight and inspiration.

  • Top 5 Essential Fabric Storage Solutions

    Top 5 Essential Fabric Storage Solutions

    As a fabric fiend, I know how important it is to have a well-organized space to store all those beautiful patterns and textures. Whether you’re just starting out or an experienced seamstress, having the right storage solution can make a huge difference in your sewing experience. So, let’s dive into the top 5 essential fabric storage solutions that will keep your creativity flowing!

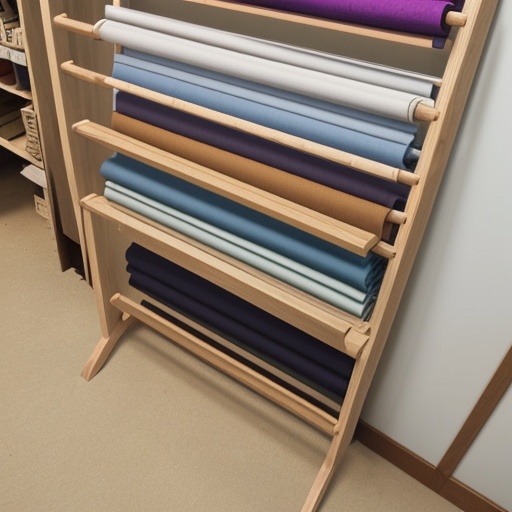
    1. Wall-mounted Fabric Roll Holder

    Wall-mounted Fabric Roll Holder

    If you have a lot of fabric rolls, a wall-mounted holder is the perfect solution. This versatile storage option allows you to hang your fabric rolls up high where they won’t take up valuable floor space. Plus, it keeps your workspace clutter-free and makes it easy to find exactly what you need when you’re ready to sew.

    2. Fabric Organizer Box

    Fabric Organizer Box

    For smaller spaces or those with limited wall space, a fabric organizer box is the way to go. This compact and stylish option allows you to neatly store your fabrics in separate sections, making it easy to find exactly what you need. Plus, it’s perfect for taking on-the-go, whether you’re out at a craft fair or working from home.

    3. Drawer Divider

    Drawer Divider

    If you have a lot of small fabric scraps, drawer dividers are your best friend. These handy tools allow you to separate different colors and types of fabric, making it easy to find exactly what you need for your projects. Plus, they’re easy to clean and will last you for years to come.

    4. Fabric Storage Bin

    Fabric Storage Bin

    For those with larger spaces, a fabric storage bin is the perfect solution. This durable and stylish option allows you to store your fabrics in large sections, making it easy to find exactly what you need. Plus, it’s perfect for keeping your workspace organized and clutter-free.

    5. Fabric Hanging Rack

    Fabric Hanging Rack

    If you have a lot of fabric sheets or large pieces, a hanging rack is the perfect solution. This stylish and practical option allows you to hang your fabrics up high where they won’t take up valuable floor space. Plus, it’s easy to clean and will last you for years to come.

    So there you have it – the top 5 essential fabric storage solutions that will keep your creativity flowing. No matter how big or small your sewing space is, there’s a solution out there for everyone. Happy sewing!

  • Hand Sewing vs Machine Sewing: When to Use Each

    Hey there, fellow sewists! Today, we’re diving into a question that’s as old as time itself: hand vs. machine. Are you ready for some serious hand-stitching action? Grab your needles and threads, because it’s time to find out when to use each method.

    The Basics of Hand Sewing

    Hand sewing is like the old-school charm bracelet of the sewing world. It’s that vintage piece you can’t resist wearing, even if there are easier ways to get dressed in the morning. With hand sewing, you have complete control over your stitches and designs. Perfect for those intricate details or delicate fabrics.

    When to Use Hand Sewing:

    • Decorative Embroidery: Add some pizzazz with decorative stitching on a quilt, pillow, or even a piece of clothing. It’s like adding the finishing touches to a masterpiece.
    • Repair Jobs: When your favorite jeans have a small rip, hand sewing can be your savior. You won’t get the same neatness from a machine, and that’s okay! It adds character, right?
    • Detailed Handwork Projects: If you’re making something like a patchwork quilt or crocheting a lace doily, hand sewing lets you create unique designs with each stitch.

    Machine Sewing: The Fast Lane

    Machines are the modern marvels of the sewing world. They’re like the turbo boost on your car—faster, more efficient, and a bit easier to navigate. With machine sewing, you can tackle big projects in no time. Just remember, not all machines are created equal. Some may require a bit of setup and maintenance.

    When to Use Machine Sewing:

    • Bulkier Fabrics: If you’re working with heavy fabrics like denim or leather, machine sewing is your best bet. It can handle the thickness and weight much better than a needle and thread.
    • Speedy Projects: When time is of the essence (like making matching pillows for a weekend project), grab that machine and let it do its thing. You’ll thank yourself later!
    • Consistency Matters: If you’re aiming for a clean, uniform look, like straight seams or zigzag stitches, a machine will give you the professional finish.

    The Best of Both Worlds

    So here’s the kicker: You don’t have to choose! Hand and machine sewing are like peanut butter and jelly. You can use both together for the ultimate sewing experience. For example, you might hand-stitch a beautiful button onto your jacket before using a machine to sew the rest of the seam.

    Remember, whether you’re hand sewing or machine sewing, the most important thing is that you enjoy the process. So go ahead and give both methods a try. You never know what kind of magic you might create!