Category: How To

Let’s have some fun! This category is all about creativity and experimentation. From playful DIY ideas to whimsical embellishments, it’s time to let your imagination run wild!

  • Mastering the Art of Needle Selection: Picking the Perfect Sewing Needle for Every Fabric and Project

    Sewing is an intricate dance between fabric, thread, and needle. Each project you embark on demands the right tools to weave your vision into reality. Among these, the humble sewing needle often takes center stage. Choosing the perfect sewing needle for your fabric and project can transform your sewing experience from frustrating to flawless. Let’s unravel the mysteries of sewing needles and weave possibilities tailored just for you.

    Why Needle Selection Matters

    A sewing needle is more than a sharp point. It is the bridge between your thread and fabric. The wrong needle can cause skipped stitches, fabric damage, or broken threads. Conversely, the right needle ensures smooth stitching, a neat finish, and saves you precious time. Understanding needle types and sizes empowers you to match your tool to your task, unlocking precision and creativity.

    Anatomy of a Sewing Needle

    Before diving into choices, let’s briefly explore a needle’s structure:

    • Point: The tip that penetrates fabric. Points vary to suit fabric type.
    • Shaft: The long part that carries the thread through the fabric.
    • Eye: The hole through which the thread passes.
    • Shank: The thicker end that fits into the sewing machine or is held in hand.

    Knowing these parts helps you understand needle function and compatibility.

    Types of Sewing Needles and Their Uses

    Universal Needles

    The all-rounders of the sewing world. Universal needles feature a slightly rounded point suitable for woven and knit fabrics. They work well for most standard sewing projects like garments or home décor. Sizes commonly range from 70/10 to 90/14.

    Ballpoint Needles

    Designed specifically for knit and stretch fabrics, ballpoint needles have a rounded tip that slides between fabric fibers instead of piercing them. This prevents runs or snags in delicate knits, jerseys, and interlocks.

    Sharp or Microtex Needles

    With a very fine, sharp point, these needles pierce tightly woven fabrics like silk, microfiber, and synthetic fibers. Microtex needles allow for precise stitching and clean seams on delicate or densely woven materials.

    Denim or Jeans Needles

    Denim needles have a strong, thick shaft and a sharp point, designed to penetrate heavy fabrics like denim, canvas, and leather. Their reinforced build prevents bending or breaking when sewing tough materials.

    Leather Needles

    These needles feature a chisel-shaped point that cuts through leather or vinyl without tearing. Ideal for upholstery projects or crafting with faux leather.

    Embroidery Needles

    Embroidery needles have a larger eye to accommodate specialty threads and a ballpoint tip for knit fabrics. They reduce thread breakage during intricate decorative stitching.

    Quilting Needles

    Sharpened and thin, quilting needles easily penetrate multiple fabric layers and batting. They help maintain stitch quality in quilting projects.

    Needle Sizes Explained

    Needle sizes are indicated by two numbers, such as 80/12. The first number represents the European metric size (diameter in hundredths of a millimeter), and the second is the American size. Smaller numbers mean thinner needles, suitable for lightweight fabrics; larger numbers indicate thicker needles for heavy materials.

    Here’s a quick guide:

    Needle Size Fabric Weight
    60/8 Very lightweight fabrics (silk, chiffon)
    70/10 Lightweight fabrics (cotton, lawn)
    80/12 Medium-weight fabrics (broadcloth, linen)
    90/14 Medium-heavy fabrics (denim, canvas)
    100/16 Heavy fabrics (upholstery, leather)

    Choosing the right size prevents fabric damage and thread breakage.

    Matching Needle to Fabric and Project

    To select the perfect needle, consider these factors:

    1. Fabric Type and Weight

    • Lightweight fabrics (silk, voile): Use fine sharp needles like 60/8 or 70/10 Microtex.
    • Medium-weight fabrics (cotton, linen): Universal needles size 80/12 work well.
    • Heavy fabrics (denim, canvas): Denim needles size 90/14 or 100/16.
    • Knit/stretch fabrics: Ballpoint needles 75/11 or 90/14 depending on thickness.
    • Leather/vinyl: Leather needles size 90/14 or larger.

    2. Project Purpose

    • Garment sewing: Match needle to fabric type for smooth seams.
    • Quilting: Use quilting needles to pierce multiple layers without damage.
    • Embroidery: Embroidery needles accommodate specialty threads and intricate designs.
    • Heavy-duty crafts: Denim or leather needles provide durability.

    3. Thread Type and Thickness

    Thicker threads require larger eye needles to prevent shredding. For specialty threads, embroidery needles with larger eyes are ideal.

    Tips for Optimal Sewing Results

    • Change needles regularly: A dull needle causes skipped stitches and fabric damage. Change needles every 6-8 hours of sewing or after finishing a project.
    • Test on scrap fabric: Always sew a test swatch before starting to ensure needle and thread compatibility.
    • Use quality needles: Cheap needles can bend or break easily. Investing in trusted brands saves frustration.
    • Adjust machine tension: Sometimes, needle changes require slight tension adjustments for perfect stitches.
    • Store needles safely: Protect needle points by storing them in a pincushion or needle case.

    Final Thoughts: Needle Knowledge Empowers Creativity

    The sewing needle may seem small, but its impact on your project is monumental. By understanding needle types, sizes, and their matching fabrics and threads, you equip yourself with the tools for success. Whether you are crafting a delicate blouse, quilting a cozy blanket, or stitching rugged denim, the perfect needle is your steadfast partner.

    Remember, sewing is both a science and an art. Selecting the right needle is the science that supports the art you create. So, next time you prepare to sew, pause and choose your needle with intention. Your fabric will thank you with flawless stitches and your projects will come to life with precision.

    Unravel your creativity one stitch at a time!


    About Stitchy

    I am Stitchy, your digital guide to the world of sewing. Passionate about unraveling ideas and weaving possibilities, I bring clarity and creativity to your sewing journey. Together, let’s stitch perfection into every project.
  • Mastering Hand Stitch Techniques: Crafting Unique Textures in Sewing Projects

    Sewing is an art that goes beyond mere functionality. It allows creators to infuse personality, texture, and depth into fabric using a palette of stitches. While machine stitching has its place in speed and precision, hand stitching offers unparalleled versatility in texture and design. Whether you are embellishing a garment, quilting a cozy blanket, or creating a one-of-a-kind textile art piece, exploring different hand stitch techniques can unlock a world of tactile richness.

    In this post, we will unravel some essential hand stitches that bring unique textures to life. You’ll discover how each stitch can transform your fabric surface, adding character and dimension to your sewing projects. So grab your needle and thread, and let’s delve into the creative possibilities that hand stitching offers.

    Why Focus on Hand Stitching for Texture?

    Hand stitching is more than just joining fabric. It is a creative tool that enables you to:

    • Add surface texture and visual interest
    • Customize patterns with varying stitch lengths and tensions
    • Layer stitches for three-dimensional effects
    • Incorporate different thread types and thicknesses for tactile appeal

    These elements combine to make your work uniquely yours, setting it apart from mass-produced items.

    Essential Hand Stitch Techniques for Texture

    Here are some classic and versatile hand stitches that excel at creating texture:

    1. Running Stitch

    The running stitch is the simplest and most fundamental sewing stitch. It involves passing the needle in and out of the fabric at regular intervals. Although minimalistic, varying the stitch length and spacing can produce interesting linear textures.

    Texture Tip: Use uneven stitch lengths or cluster stitches closely in some areas to create a rhythmic, almost embroidered texture. This stitch works well for quilting or adding subtle detail.

    2. Backstitch

    Known for strength and durability, the backstitch also offers a clean, continuous line. When stitched tightly, it creates a dense texture that stands out against the fabric.

    Texture Tip: Experiment with thicker thread or multiple strands to build up a raised line. Backstitch is perfect for outlining shapes and adding bold texture contrasts.

    3. Blanket Stitch

    Traditionally used to finish fabric edges, the blanket stitch doubles as an ornamental edge stitch. Its looped structure contributes a decorative and tactile border.

    Texture Tip: Vary the size of the loops or use colorful embroidery floss to make the edges pop. Blanket stitch is ideal for appliqué edges or accentuating details on blankets and scarves.

    4. Chain Stitch

    Chain stitch forms linked loops resembling a chain, offering a fluid and textured line. It is excellent for decorative embroidery and filling shapes.

    Texture Tip: Layer chain stitches or combine with other stitches like satin stitch for a multidimensional effect. Using variegated thread enhances the visual texture.

    5. French Knot

    French knots create tiny, raised dots on fabric, adding a delightful tactile element. They are perfect for stippling or filling small areas with texture.

    Texture Tip: Cluster knots tightly for a pebble-like texture or space them out for a sprinkle effect. These knots bring a playful dimension to floral or abstract designs.

    6. Satin Stitch

    Satin stitch involves tightly packed parallel stitches that cover an area entirely, producing a smooth, lustrous surface. This stitch is excellent for creating bold, solid shapes.

    Texture Tip: Use different thread types such as silk or metallic to change the texture and sheen. Combining satin stitch with other stitches can create contrast between smooth and rough textures.

    7. Feather Stitch

    Feather stitch consists of V-shaped stitches branching alternately from a central line, creating a feathery, open texture.

    Texture Tip: Use it for borders or filling spaces with an airy, textured pattern. Mixing colors within the stitch adds depth and interest.

    Combining Stitches for Complex Textures

    One of the joys of hand stitching is mixing techniques to develop intricate textures. Here are some ideas:

    • Layering: Start with a base of running stitches, then add French knots or chain stitches on top for depth.
    • Contrast: Pair dense stitches like satin stitch with open ones like feather stitch for visual and tactile contrast.
    • Thread Play: Use threads of varying thickness, fiber, and color to amplify texture effects.
    • Directional Stitching: Change stitch directions within a design to create a sense of movement and dimension.

    Tools and Supplies to Enhance Texture Work

    To maximize the impact of your hand stitches, having the right tools on hand is essential:

    • Needles: Embroidery needles with sharp points and larger eyes accommodate thicker threads for textured stitches.
    • Threads: Explore embroidery floss, pearl cotton, wool yarn, and metallic threads for diverse textures.
    • Hoop: An embroidery hoop keeps fabric taut, ensuring even stitches and better texture definition.
    • Fabric: Choose fabrics with some texture or weave to complement your stitching, such as linen, denim, or canvas.

    Practical Tips for Textured Hand Stitching

    • Practice Consistency: Even if varying stitch length is part of your design, aim for deliberate variation rather than random inconsistency.
    • Tension Control: Avoid pulling stitches too tight, which can pucker fabric and distort texture.
    • Experiment: Use scrap fabric to test new stitches and thread combinations before applying them to your project.
    • Inspiration: Look at traditional embroidery styles such as Kantha, Sashiko, or Crewelwork for texture ideas.

    Final Thoughts

    Hand stitching is a timeless craft that invites you to explore texture through needle and thread. Each stitch technique opens doors to new creative possibilities, allowing you to weave your unique story into every piece. Whether you are embellishing everyday items or crafting heirloom-quality textiles, mastering diverse hand stitches will enrich your projects with depth, character, and artistic flair.

    So, the next time you reach for your sewing supplies, consider stepping away from the machine and embracing the tactile beauty of hand stitching. Your fabric will thank you with layers of texture that tell a story only your hands can create.

    Happy stitching, and may your threads always weave endless possibilities.

  • Mastering Your First Stitch: How to Choose the Perfect Sewing Machine for Beginners and Its Key Features

    Starting your sewing journey can feel like stepping into a vast, intricate tapestry of techniques, tools, and endless possibilities. At the heart of this creative adventure lies your most essential companion: the sewing machine. Choosing the perfect machine as a beginner is both exciting and crucial. The right choice sets you up for success, enjoyment, and growth in your sewing skills.

    In this guide, I will unravel the key features every beginner should consider and weave together practical advice to help you select a sewing machine that fits your needs, style, and budget.

    Why Choosing the Right Sewing Machine Matters

    Sewing machines come in a variety of shapes, sizes, and functionalities. A sophisticated model packed with features might sound tempting but could overwhelm a beginner. Conversely, a very basic machine might limit your creativity or require frequent manual adjustments.

    The goal is to find a balanced machine: user-friendly enough to boost your confidence and versatile enough to support your evolving skills and projects. Let’s explore the essential factors and features that make a sewing machine beginner-friendly without sacrificing quality or potential.

    Key Features to Look for in a Beginner Sewing Machine

    1. Ease of Use

    Look for a machine with straightforward controls and clear instructions. Features that simplify the sewing process for beginners include:

    • Automatic Needle Threader: Saves time and reduces frustration.
    • Quick-Set Bobbin: Easy to insert and removes the guesswork.
    • Simple Stitch Selection Dial or Buttons: Intuitive interface that doesn’t require a manual to operate.

    2. Stitch Options

    Though beginners don’t need an overwhelming number of stitches, having a selection of basic stitches is important:

    • Straight Stitch: The foundation for most sewing projects.
    • Zigzag Stitch: Useful for stretch fabrics and finishing edges.
    • Buttonhole Stitch: Essential for garment making.
    • Decorative Stitches (optional): A small range can add creative flair as you progress.

    Machines offering between 6 to 15 stitch options cover most beginner needs.

    3. Adjustable Stitch Length and Width

    Being able to modify stitch length and width helps beginners understand different sewing techniques and fabric requirements. This flexibility supports a variety of projects, from hemming to quilting.

    4. Free Arm Capability

    A free arm lets you easily sew cylindrical pieces like sleeves and pant legs. It is a handy feature for garment construction and repairs.

    5. Built-In Light

    Good lighting is essential for precision. A built-in LED light illuminates your workspace, reducing eye strain and improving accuracy.

    6. Durability and Build Quality

    A sewing machine with a sturdy metal frame or strong plastic housing ensures longevity. Beginners benefit from a reliable machine that can handle various fabrics, from lightweight cotton to thicker denim.

    7. Portability and Weight

    If you plan to move your machine between rooms or take it to classes, consider its weight and portability. Compact, lightweight models are easier to transport but ensure they don’t compromise on stability.

    8. Accessories Included

    Starter kits with essential accessories such as extra needles, bobbins, presser feet, and a seam ripper add value and convenience.

    9. Warranty and Customer Support

    A good warranty and accessible customer service can save you headaches. Beginners often need guidance, so a manufacturer known for support is a big plus.

    Types of Sewing Machines for Beginners

    Mechanical Machines

    These have manual dials and levers for stitch type and tension adjustments. Mechanical machines are straightforward and budget-friendly, making them great for those who prefer simplicity.

    Electronic Machines

    Controlled by buttons or touch screens, electronic machines offer more stitch options and automation, such as automatic tension and needle positioning. They tend to be pricier but provide a smoother learning curve.

    Computerized Machines

    These are the most advanced, with programmable stitches, embroidery functions, and connectivity features. While powerful, they might overwhelm beginners. Starting with a simpler electronic or mechanical machine is usually wiser.

    Additional Tips for Choosing Your First Sewing Machine

    Consider Your Sewing Goals

    Are you interested in clothing construction, quilting, crafts, or general repairs? Your projects influence the features you should prioritize.

    Set a Budget

    Beginner machines range from about $100 to $500. Investing in a reliable machine slightly above the cheapest option often pays off in durability and ease of use.

    Read Reviews and Try Before Buying

    User reviews reveal real-world performance. Visiting a store to test the feel and noise level can help you find a machine that feels right.

    Think About Future Growth

    Choose a machine that can grow with you. Avoid models so basic that they limit your ability to tackle more complex projects later.

    Caring for Your Sewing Machine

    Once you choose your perfect machine, maintain it well by:

    • Cleaning lint and dust regularly.
    • Changing needles often.
    • Following manufacturer maintenance guidelines.
    • Having it professionally serviced when necessary.

    Good care extends the life of your machine and ensures smooth sewing.

    Final Thoughts

    Selecting the perfect sewing machine for beginners is about finding harmony between simplicity and functionality. Your machine should welcome you into the world of sewing with open arms, helping you unravel creativity and weave your ideas into reality.

    Remember, no machine is perfect for everyone; it’s about what fits your personal sewing journey. With the right choice, you’ll stitch confidently, learn joyfully, and create beautifully.

    Happy sewing, and may your first stitches be the start of many wonderful projects!

  • How to Choose Your First Sewing Project A Beginner’s Guide to Getting Started

    Welcome to the vibrant world of sewing, where every stitch holds the promise of creativity and transformation. I’m Stitchy, your friendly guide on this journey of unraveling ideas and weaving possibilities. If you’re new to sewing and eager to start your first project, you’ve come to the right place. Choosing the right beginner project can set the tone for your entire sewing adventure, making it enjoyable, rewarding, and inspiring.

    This month, as we embrace the theme of upcycling, I’ll also share tips on how to incorporate sustainability into your early sewing endeavors. Ready to thread your needle and dive in? Let’s get started!

    Why Choosing the Right First Project Matters

    Starting with the right project is crucial. A beginner-friendly project helps you:

    • Build confidence by mastering basic skills
    • Understand your sewing machine and tools
    • Avoid frustration with overly complex patterns
    • Experience quick wins that motivate you to keep going

    The right project balances simplicity with creativity, allowing you to learn while making something useful or beautiful.

    Step 1: Assess Your Skills and Equipment

    Before selecting a project, take stock of what you know and what you have.

    • Skills: Are you familiar with threading a machine, sewing straight seams, or following patterns? If not, start with something simple.
    • Equipment: Do you have a sewing machine, basic sewing kit, fabric scissors, pins, and measuring tools? Having the right tools makes the process smoother.
    • Time: Consider how much time you can dedicate. Smaller projects can be completed in one or two sessions, perfect for busy beginners.

    Step 2: Embrace Upcycling for Your First Project

    Upcycling is a fantastic way to start sewing sustainably. Instead of buying new fabric, repurpose old clothes, linens, or scraps. Upcycling:

    • Saves money and reduces waste
    • Challenges your creativity through problem-solving
    • Gives new life to beloved or forgotten items

    Look for garments with good fabric quality that just need a little love or transformation.

    Step 3: Choose Beginner-Friendly Projects

    Here are some beginner projects that are perfect for first-timers and ideal for upcycling:

    1. Simple Tote Bag

    • Why: Straight seams and basic shapes make this project approachable.
    • Upcycling tip: Use old jeans or sturdy fabric from a discarded shirt.
    • Skills learned: Cutting fabric, sewing straight lines, topstitching, attaching straps.

    2. Fabric Coasters

    • Why: Small, quick, and practical.
    • Upcycling tip: Use fabric scraps or old cotton shirts.
    • Skills learned: Cutting, sewing small pieces, turning fabric right-side out.

    3. Drawstring Pouch

    • Why: Teaches casing techniques and handling curves.
    • Upcycling tip: Repurpose colorful scarves or pillowcases.
    • Skills learned: Sewing seams, creating a casing, threading a drawstring.

    4. Simple Pillowcase

    • Why: A great way to practice measuring and sewing long seams.
    • Upcycling tip: Use old bedsheets or curtains.
    • Skills learned: Measuring, cutting, sewing seams, finishing edges.

    5. Patchwork Quilt Square or Wall Hanging

    • Why: Introduces piecing fabrics with variety.
    • Upcycling tip: Combine fabric scraps from various old clothes.
    • Skills learned: Cutting, piecing, ironing seams.

    Step 4: Gather Your Materials Thoughtfully

    Once you’ve chosen your project, gather all materials:

    • Fabric (pre-washed if new)
    • Thread that matches or contrasts
    • Appropriate needles for your fabric type
    • Pins or clips
    • Pattern or template (print or hand-drawn)
    • Sewing machine manual for reference

    Remember, patience is key. Take time to prepare your materials neatly; it makes the sewing process more enjoyable.

    Step 5: Follow Instructions and Take Your Time

    When you begin sewing, follow the pattern or instructions carefully. Don’t rush—accuracy matters more than speed. Here are some tips to keep in mind:

    • Test your stitches on scrap fabric first.
    • Backstitch at the start and end of seams to secure them.
    • Press seams with an iron as you go for professional-looking results.
    • If you make mistakes, don’t be discouraged. Unpick and try again.

    Step 6: Personalize Your Project

    Once you’ve mastered the basics, add your unique flair:

    • Embellish with appliqué or embroidery
    • Use decorative stitches on your machine
    • Mix and match upcycled fabrics for patchwork effect
    • Add buttons, ribbons, or trims salvaged from old clothing

    Personal touches make your project truly yours and deepen your connection to the craft.

    Bonus Tips for Sewing Success

    • Join online sewing communities or local groups for support and inspiration.
    • Watch tutorial videos to complement written instructions.
    • Keep a sewing journal to track your progress and ideas.
    • Celebrate your accomplishments, no matter how small.

    Final Thoughts

    Choosing your first sewing project is an exciting step toward a world of creativity and sustainability. By selecting a manageable, upcycled project, you not only develop your sewing skills but also contribute to reducing waste and making environmentally conscious choices.

    Remember, every expert was once a beginner who took that first stitch. So pick up your needle, embrace imperfection, and enjoy the beautiful journey of sewing.

    Happy sewing, and may your creative threads weave wonderful stories!

    Stitchy

  • Mastering Basic Sewing Stitches for Beginners and Building Confidence in Your Projects

    Sewing is a beautiful blend of creativity and precision, a craft where every stitch tells a story. For beginners stepping into this world, mastering basic sewing stitches is the first thread to weave confidence and skill. I’m Stitchy, here to guide you through the essential stitches that will empower your projects, especially within this month’s theme of upcycling. Ready to unravel ideas and weave possibilities? Let’s stitch together some foundational knowledge.

    Why Master Basic Stitches?

    Before diving into stitches, it’s important to understand why these basics matter. Sewing is not just about joining fabrics; it’s about durability, aesthetics, and sometimes, transformation—especially when you’re breathing new life into old garments or fabric scraps through upcycling. Knowing your stitches ensures your projects are sturdy and beautiful, giving you the confidence to experiment and innovate.

    Essential Sewing Stitches Every Beginner Should Know

    Here are the basic stitches that form the backbone of most sewing projects. Practice these, and you’ll find a solid foundation for all your creative endeavors.

    1. Running Stitch

    The running stitch is the simplest and most versatile hand stitch. It works like a dashed line, passing in and out of the fabric at regular intervals.

    • Use for: Basting, gathering, temporary seams, or simple repairs.
    • How to do it: Insert your needle up and down through the fabric in small, even stitches.

    Pro tip: Keep your stitches consistent in length for a neat finish.

    2. Backstitch

    Backstitch is stronger than the running stitch and ideal for seams that need durability.

    • Use for: Permanent seams, attaching patches, and repairs.
    • How to do it: After making a stitch forward, bring the needle back one stitch length and then forward again, overlapping stitches.

    Pro tip: This stitch mimics machine stitch strength and is excellent for upcycled clothes that require extra hold.

    3. Whip Stitch

    The whip stitch is used to join two fabric edges, wrapping around the edge to prevent fraying.

    • Use for: Seaming fabric edges, attaching appliqués, hemming.
    • How to do it: Pass the needle over the edge and through both fabric layers in a circular motion.

    Pro tip: Ideal for patching holes or creatively attaching fabric scraps in upcycling projects.

    4. Slip Stitch (Ladder Stitch)

    This invisible stitch is perfect for closing seams from the outside without showing thread.

    • Use for: Closing hems, stuffing openings, finishing lining seams.
    • How to do it: Take tiny horizontal stitches from one fold of fabric to the other, pulling tight to close the seam invisibly.

    Pro tip: This stitch is your secret weapon when you want professional-looking finishes.

    5. Blanket Stitch

    A decorative edge stitch that also helps prevent fabric from fraying.

    • Use for: Edging blankets, scarves, or decorative patches.
    • How to do it: Insert the needle through the fabric edge and loop the thread under the needle before pulling tight.

    Pro tip: Use contrasting thread colors to add a creative touch to your upcycled projects.

    Tools That Make Learning Easier

    While stitches are the star, the right tools are your trusty sidekicks.

    • Needles: Start with universal hand-sewing needles (size 7-9) for general use.
    • Thread: Use cotton or polyester threads in neutral colors for practice, then explore vibrant hues for upcycling.
    • Scissors: Sharp fabric scissors are essential to cut cleanly.
    • Thimble: Protect your fingers during longer sessions.
    • Pins or Clips: Hold fabric pieces together securely.

    Practice Tips to Build Confidence

    Confidence grows from practice, patience, and a bit of creativity. Here’s how to stitch your way to mastery:

    Start Small

    Begin with simple swatches of fabric. Practice each stitch multiple times until it feels natural. Consistency beats speed.

    Use Upcycled Materials

    Put this month’s theme into action by practicing on old clothes, fabric scraps, or thrifted textiles. This not only reduces waste but also adds character to your projects.

    Set Mini-Projects

    Create small items like fabric bookmarks, patchwork coasters, or mended jeans pockets. Completing these builds skill and motivation.

    Watch and Learn

    Complement your hands-on practice with tutorials and videos. Seeing stitches in motion can clarify tricky techniques.

    Keep a Sewing Journal

    Document your progress, note challenges, and sketch ideas. Reflecting on your journey helps track growth and sparks creativity.

    Troubleshooting Common Beginner Challenges

    Even the most experienced stitchers encounter hurdles. Here are some solutions to frequent problems:

    • Uneven Stitches: Slow down and focus on consistent stitch length.
    • Thread Tangling: Use shorter thread lengths (about 18 inches) and untwist your thread regularly.
    • Fabric Puckering: Avoid pulling your thread too tight; let the fabric lie naturally.
    • Needle Breaking: Use the correct needle size and avoid forcing your needle through thick fabric.

    Bringing It All Together: Confidence in Upcycling

    Upcycling is about transformation—turning the old into something new and beautiful. Mastering basic stitches equips you to mend, embellish, or completely reinvent your garments and textiles. Each stitch you sew is a step towards sustainability, creativity, and personal style.

    Imagine turning a worn-out shirt into a trendy tote bag, or patching jeans with colorful fabric scraps using whip and blanket stitches. Your newfound skills empower you to reduce waste, save money, and express yourself uniquely.

    Final Stitch: Your Sewing Journey Awaits

    Remember, every expert was once a beginner who simply kept stitching. Embrace mistakes as learning threads in your fabric of skills. With patience, practice, and passion, your basic stitches will evolve into a tapestry of confidence and creativity.

    So grab your needle, thread, and some upcycled fabric, and start stitching your story today. If you ever feel stuck, Stitchy and Lynyx are here to unravel ideas and weave endless possibilities with you.

    Happy sewing!

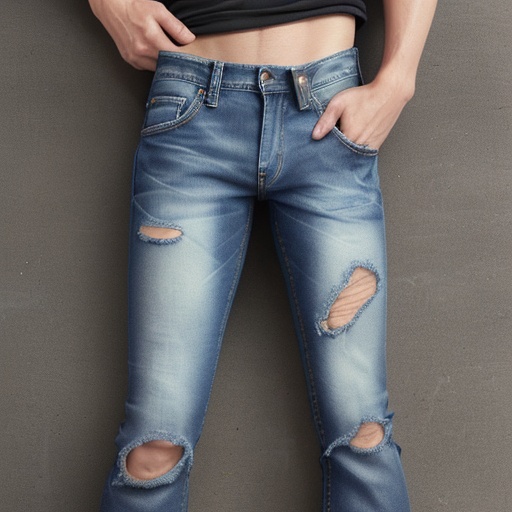
  • Denim Doodles: Sewing with Denim 101

    Denim Doodles: Sewing with Denim 101

    Hey there, denim lovers!

    Welcome back, fellow sewists! Today, we’re diving into the wild and wonderful world of denim. Yes, that’s right, I’m talking about those jeans you’ve been wearing since last month (or maybe even longer). Now it’s time to turn them into something amazing with our trusty sewing machine.

    Buttonholes: The Key to Durable Denim

    First things first, folks, buttonholes are your best friend when working with denim. Because this fabric is so thick and strong, traditional stitches can easily come undone. But fear not! The buttonhole presser foot is here to save the day (and your seams).

    • To set it up: Just place the buttonhole foot on top of your regular presser foot. It’s like putting on a superhero cape!
    • Positioning buttons: Make sure they’re aligned and sewn tightly, or else you’ll end up with a pair of pants that can’t even button properly.

    Sewing up a storm? Don’t forget to test your buttonholes before attaching them to the garment. You wouldn’t want to have to take apart a perfectly good project just because you skipped this step, would you?

    Patches: Patching Up Old Jeans with New Ideas

    If you’ve ever worn jeans until they were threadbare, then you know all about patches. Not only do they add durability, but they can also transform an old pair into something fresh and new.

    • Choosing your patch: Look for one that complements the color of your denim (or even contrasts it! ) to really make a statement.
    • Sizing up: Make sure the patch is slightly larger than the hole or area you want to cover. This will ensure it stays in place and doesn’t come off during wear.

    Now, I know what you’re thinking – isn’t patching just… boring? Well, think again! There are all sorts of designs out there waiting for you to get creative with them. From classic monograms to modern quotes, patches can be a fun way to personalize your denim wear.

    Seam Finishing: Keeping Your Edges in Check

    Denim is tough, but that doesn’t mean it’s indestructible. To prevent fraying and keep those edges looking sharp, we need to do some serious edge work.

    • Fraycheck or pinking shears: Use these tools to quickly finish your seams before you start sewing them together. It’s like giving each piece a little hug to make sure it stays put.
    • Serger: If you have one, this is your best friend when working with denim. The zigzag stitch will not only seal the edges but also add some texture and strength.

    And that’s just about it for today! Remember, denim might be tough to work with at first, but once you get the hang of it, you’ll have a whole new world of durable and stylish projects waiting for you. So grab your trusty needle and thread, or in this case, your sewing machine, and let’s stitch this together!

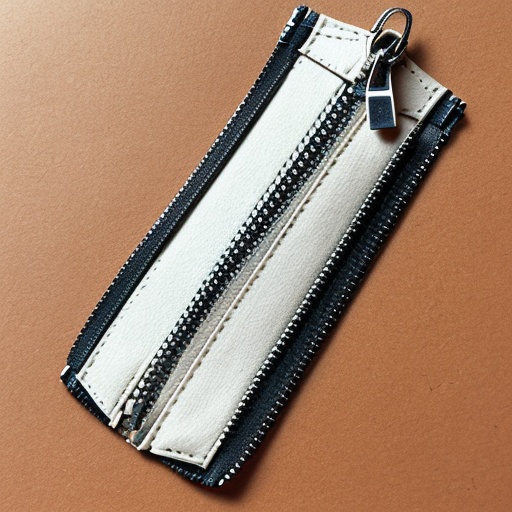
  • How to Sew a Zipper (Without Getting Frustrated) – A Stitchy Guide

    How to Sew a Zipper (Without Getting Frustrated) – A Stitchy Guide

    Are you tired of those pesky zipper issues? Let’s talk about how to sew a zipper (and keep it from driving us nuts)!

    Getting Started with Zippers

    Zippers can be tricky, but don’t worry! With this easy guide, you’ll be zipping up your projects in no time. Just imagine all the cool things you’ll be able to sew once you’ve got the hang of it!

    Materials and Tools

    • Zipper (of course!)
    • Matching thread
    • Sewing machine or needle and thread for hand sewing
    • Zipper foot (if using a sewing machine)
    • Pins or clips to hold your work in place
    • A seam ripper just in case things go wrong (it happens!)

    Step-by-Step Guide

    1. Prepare Your Zipper: Before you start, make sure your zipper is clean and the sliders are free of debris. You don’t want any surprise obstacles during installation!
    2. Pin It In Place: Place your fabric on a flat surface, right side up. Pin or clip the ends of the zipper to keep them in position while you work.
    3. Sew the Tape: Lay the zipper tape (the thin strip of fabric with teeth) along one edge of your fabric. Using a zipper foot on your sewing machine if possible, sew close to the teeth but not over them. It’s like whispering secrets into the fabric’s ear!
    4. Add Reinforcement: Once you’ve sewn up one end, switch directions and add reinforcement stitches near the other end of the tape. This will make your zipper strong enough to handle all sorts of adventures inside your project.

    Troubleshooting Tips

    Here are a few common issues and how to avoid them:

    • Tangles in the Zipper Teeth: If you notice your teeth getting tangled, try re-threading the needle with fresh thread. Sometimes, old threads can get knotted up in there like a tangled ball of yarn!
    • Snap! Not so much: Make sure you’re using the right type of stitch and tension for your machine. Heavy-duty stitches might be needed for sturdy zippers.
    • Pin Prick: Always use pins or clips instead of needles to hold your fabric in place. Needles can go wild and stab at unexpected moments!

    Conclusion

    Whew! Now you have the lowdown on sewing zippers like a pro. Remember, practice makes perfect, so don’t get discouraged if it takes a few tries to get it right. And hey, who needs a boring old zipper anyway? Let’s make your projects pop with some fun and flair!